如果我们直接使用 embedded-graphics 为 st7789 屏幕写复杂的 UI 的话,那么这可能是一个相当痛苦的体验。Rust 版本的 lvgl 似乎并没有准备好。
无意中发现, Ratatui 竟然还有嵌入式版本: Mousefood。
Ratatui 一般用来在终端上绘制 UI,可以理解为,它是基于文本实现的UI框架。这似乎和嵌入式屏幕没什么关系。 然而,其实大错特错了。mipi 高清屏幕确实可能需要更高级更好效果的UI 框架(比如手机屏幕)。但是还有非常大量的一些小屏幕,它们的分辨率非常的低(比如 128x128、128x64 ),甚至只有墨水屏。这些屏幕刚好只适合使用文本和一些简单的图形。
这时候,Ratatui 就派上了用场了。
实现
我们最好使用 no-std 模式,因此需要禁止默认特性:
[dependencies]
mousefood ={ version = "0.4.0", default-features = false, features = ["fonts"]}
之前我们使用 mipidsi 库初始化屏幕的时候,是这样的:
let mut display = Builder::new(ST7789, di)
        .reset_pin(rst)
        .color_order(mipidsi::options::ColorOrder::Rgb)
        .invert_colors(mipidsi::options::ColorInversion::Inverted)
        .init(&mut delay)
        .unwrap();
这里存在一个巨大的坑在里面。那就是 mousefood 必须指定显示大小,否则会造成空屏,只有背光亮。并且完全不会报错。
因此我们需要在初始化时指定显示大小:
    let mut display = Builder::new(ST7789, di)
        .reset_pin(rst)
        .display_size(240, 240) // <--------必须加上这一行!
        .color_order(mipidsi::options::ColorOrder::Rgb)
        .invert_colors(mipidsi::options::ColorInversion::Inverted)
        .init(&mut delay)
        .unwrap();
配置终端实例:
    let config = EmbeddedBackendConfig {
        font_regular: MONO_10X20,
        // font_bold: Some(REGULAR_FONT),
        // font_italic:  Some(REGULAR_FONT),
        // color_theme:  theme,
        ..Default::default()
    };
    let backend = EmbeddedBackend::new(&mut display, config);
    let mut terminal = Terminal::new(backend).expect("failed to create terminal");
我们可以通过 EmbeddedBackendConfig 来配置字体的大小。
但是,mousefood 库使用的是 embedded-graphics 中的 mono font,默认是没有中文的。
那我们自己制作 mono 格式的中文字体?之前的文章: 《嵌入式 Rust 中显示中文字符》 里试过了,使用 mono font 格式的中文字体,它的字宽非常的夸张。
然而, mousefood 库并不支持 bdf 格式的字体。
理论上,拿到 terminal 后就可以直接绘制ui了。
terminal.draw(draw).unwrap();
loop {
// terminal
// .draw(|f| {
// let area = f.area();
// f.render_widget(Block::bordered().title("Test"), area);
// })
// .unwrap();
// println!("Here is loop.");
delay.delay_millis(2000);
}
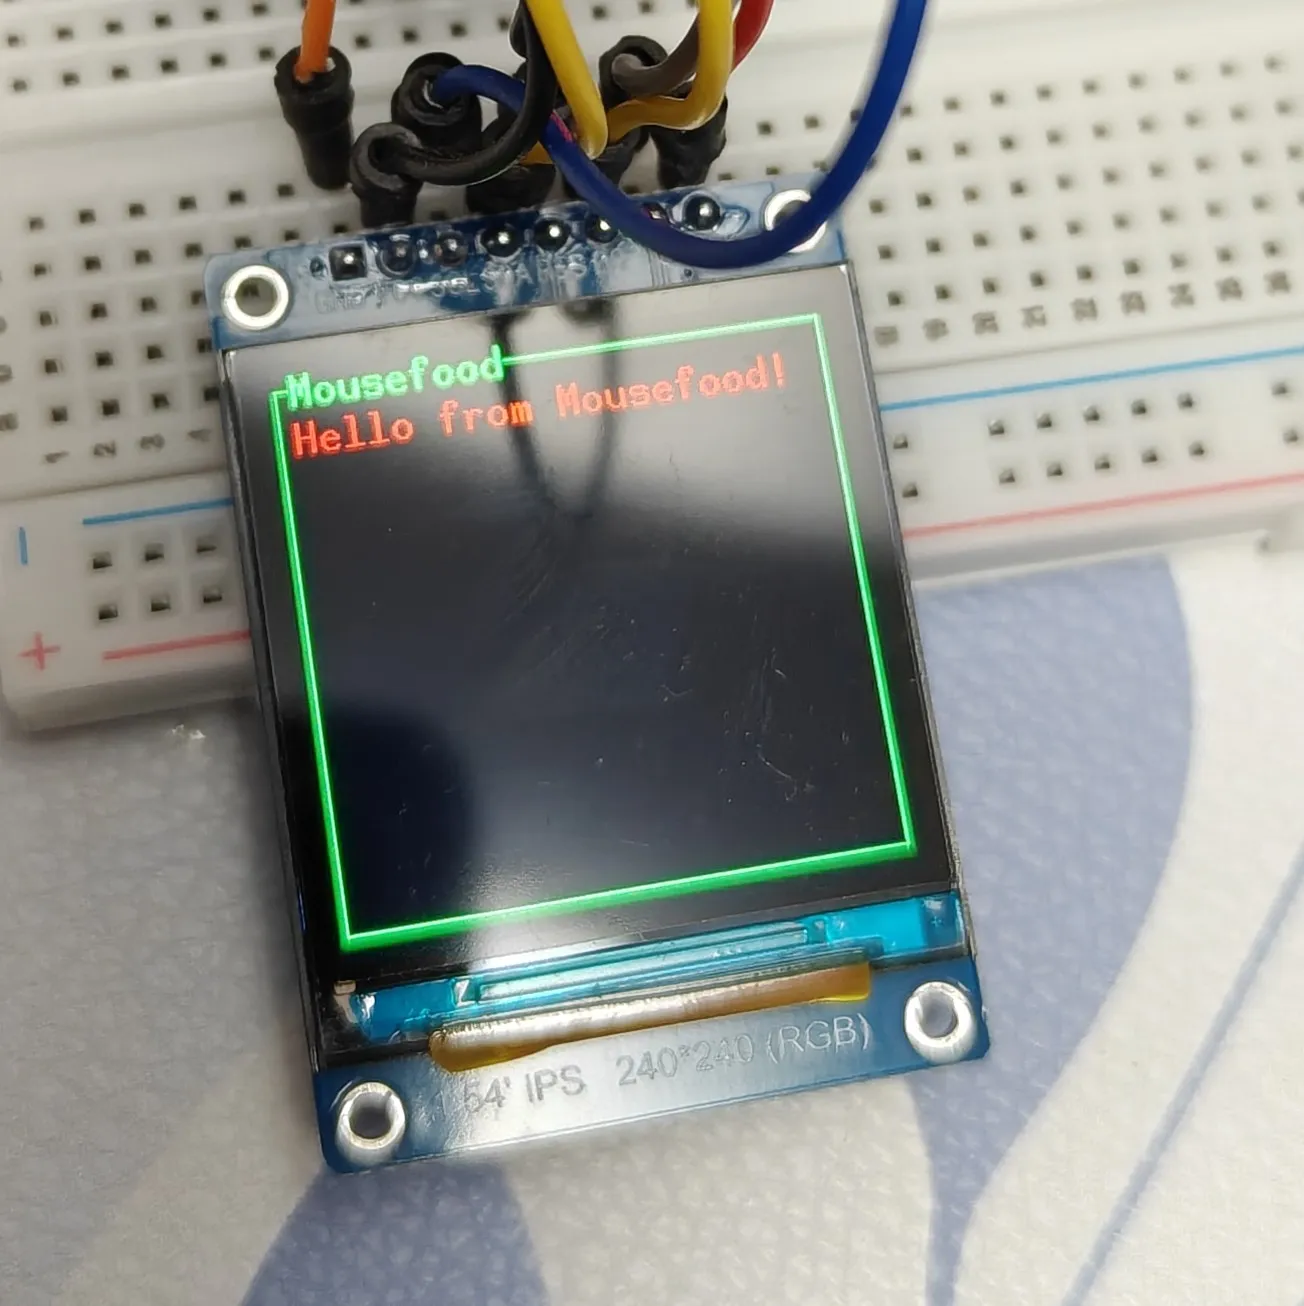
fn draw(frame: &mut Frame) {
let block = Block::bordered()
.title("Mousefood")
.style(Style::new().fg(ratatui::style::Color::Green));
let paragraph = Paragraph::new("Hello from Mousefood!")
.style(Style::new().fg(ratatui::style::Color::Red))
.block(block);
frame.render_widget(paragraph, frame.area());
}
效果如下:
其他
其中 mousefood 的官方示例里有一个esp32的示例。如果你也和我一样,抱着 esp32应该和esp32s3 差不多,改改就能用的想法的话,那么要注意的是:
let spi = Spi::new(
        peripherals.SPI2,
        SpiConfig::default()
            .with_frequency(Rate::from_mhz(30))
            .with_mode(Mode::_3),// <-------must be in mode 0 for my esp32s3
    )
    .unwrap()
    .with_sck(peripherals.GPIO5)
    .with_mosi(peripherals.GPIO6);
有可能 .with_mode(Mode::_3) 会导致屏幕不显示。至少在我的设备上,需要设置为 .with_mode(Mode::_0) 。这个问题它不会panic也不会提示任何错误。就是单纯地不显示。这需要非常熟悉屏幕硬件和 spi 协议的人才能快速地找原因出来。
这段代码是用来干什么的?
它定义了 SPI 设备的四种工作模式(0、1、2、3)。当你的设备通过 SPI 协议与其他芯片(如传感器、显示屏、SD卡等)通信时,双方必须使用相同的模式才能正常工作。
SPI 模式的两个关键参数
代码注释中提到的两个参数决定了通信的时序:
-
CPOL (Clock Polarity):时钟空闲时的电平
- CPOL = 0:空闲时时钟为低电平
- CPOL = 1:空闲时时钟为高电平
-
CPHA (Clock Phase):数据采样的时机
- CPHA = 0:在时钟的第一个边沿采样
- CPHA = 1:在时钟的第二个边沿采样
四种模式的详细说明
| 模式 | CPOL | CPHA | 空闲时钟 | 数据采样 | 常见用途 |
|---|---|---|---|---|---|
| Mode 0 | 0 | 0 | 低电平 | 上升沿采样 | 最常用,许多设备默认 |
| Mode 1 | 0 | 1 | 低电平 | 下降沿采样 | 某些特定设备 |
| Mode 2 | 1 | 0 | 高电平 | 下降沿采样 | 某些特定设备 |
| Mode 3 | 1 | 1 | 高电平 | 上升沿采样 | 也较常见 |
完整代码
实现的完整代码如下:
#![no_std]
#![no_main]
#![deny(
    clippy::mem_forget,
    reason = "mem::forget is generally not safe to do with esp_hal types, especially those \
    holding buffers for the duration of a data transfer."
)]
#![deny(clippy::large_stack_frames)]

use alloc::boxed::Box;
use defmt::println;
use defmt_rtt as _;
use embedded_graphics::pixelcolor::Rgb888;
use embedded_graphics::prelude::{DrawTarget, Point, RgbColor, Size};
use embedded_graphics::primitives::Rectangle;
use embedded_hal_bus::spi::ExclusiveDevice;
use esp_alloc as _;
use esp_hal::main;
use esp_hal::{clock::CpuClock, delay::Delay, gpio, spi::master::Config, time::Rate};
use tui::regular_font::REGULAR_FONT;
use mipidsi::{Builder, interface::SpiInterface, models::ST7789};
use mousefood::fonts::MONO_10X20;
use mousefood::prelude::*;
use ratatui::{
    Frame, Terminal,
    layout::Rect,
    style::Style,
    widgets::{Block, Paragraph},
};


#[panic_handler]
fn panic(_: &core::panic::PanicInfo) -> ! {
    loop {}
}

extern crate alloc;

esp_bootloader_esp_idf::esp_app_desc!();

#[allow(
    clippy::large_stack_frames,
    reason = "it's not unusual to allocate larger buffers etc. in main"
)]
#[main]
fn main() -> ! {
    let mut delay = Delay::new();
    let config = esp_hal::Config::default().with_cpu_clock(CpuClock::max());
    let peripherals = esp_hal::init(config);

    esp_alloc::heap_allocator!(size: 64 * 1024);

    // LCD init
    let dc = gpio::Output::new(peripherals.GPIO15, gpio::Level::Low, Default::default());
    let mut rst = gpio::Output::new(peripherals.GPIO7, gpio::Level::Low, Default::default());
    rst.set_high();
    let cs = gpio::Output::new(peripherals.GPIO16, gpio::Level::High, Default::default());
    let spi = esp_hal::spi::master::Spi::new(
        peripherals.SPI2,
        Config::default().with_frequency(Rate::from_mhz(30)),
    )
    .unwrap()
    .with_sck(peripherals.GPIO5)
    .with_mosi(peripherals.GPIO6);

    let spi_device = ExclusiveDevice::new_no_delay(spi, cs).unwrap();
    let buffer = Box::leak(Box::new([0_u8; 512]));

    let di = SpiInterface::new(spi_device, dc, buffer);
    let mut display = Builder::new(ST7789, di)
        .reset_pin(rst)
        .display_size(240, 240)
        .color_order(mipidsi::options::ColorOrder::Rgb)
        .invert_colors(mipidsi::options::ColorInversion::Inverted)
        .init(&mut delay)
        .unwrap();

    let config = EmbeddedBackendConfig {
        font_regular: MONO_10X20,
        // font_bold: Some(REGULAR_FONT),
        // font_italic:  Some(REGULAR_FONT),
        // color_theme:  theme,
        ..Default::default()
    };

    let backend = EmbeddedBackend::new(&mut display, config);

    let mut terminal = Terminal::new(backend).expect("failed to create terminal");

    terminal.draw(draw).unwrap();
    loop {
        // terminal
        //     .draw(|f| {
        //         let area = f.area();
        //         f.render_widget(Block::bordered().title("Test"), area);
        //     })
        //     .unwrap();

        // println!("Here is loop.");
        delay.delay_millis(2000);
    }
}

fn draw(frame: &mut Frame) {
    let block = Block::bordered()
        .title("Mousefood")
        .style(Style::new().fg(ratatui::style::Color::Green));
    let paragraph = Paragraph::new("Hello from Mousefood!")
        .style(Style::new().fg(ratatui::style::Color::Red))
        .block(block);
    frame.render_widget(paragraph, frame.area());
}